Manta Mal Posted August 13, 2008 Author Share Posted August 13, 2008 MANTA RESTORE PART 7 Hi Guys, am back with an update, has been over a year, had to finish me kitchen last year, took several more months than expected, then in early 2008, the auto box in my daily work horse failed <!-- s:sad --><!-- s:sad -->, several weeks to fix and loads of cash raided from the Manta fund <!-- s:cry --><!-- s:cry --> . Attended billing this year to see some great Manta's, which has sure fired me up to continue with my project. OK down to business, before fitting the front wings and valance, they had to be stripped of the brush on paint that has been protecting them for the last 10 years in storage..................... The front valance was welded to the body along the top edge. The veng wings had to be tweeked to fit, each wing was trial fitted several times before applying seam sealer/adhesive then final bolt on. Gave the panels a quick coat of rattle can prime, then lowered the body back down on the wheels, rolled outside garage for an inspection, well pleased <!-- s:D --><!-- s:D --> ............ With the car now outside, decided to start on the rear end. The spare wheel well had rusted through, in the usual place. I intend having wider and larger 15" road wheels, including the spare, so would make sense to cut out the well and make a new enlarged item..... Cut out the usual card template, then from sheet steel. I used the thicker 1.5mm steel here, to give the enlarged well extra strength and take the weight of the new size spare wheel......... I just use a self tapping screws/washers, every other hole, on the first pass of plug welding, then remove the screws and weld the remainder up, on the 2nd pass............. Welds all ground flat and a dusting of primer...... While I was in the boot, removed all the back sound deadening sheet. As before just warm (not melt) with the heat gun, it then scrapes off like butter.................. Will post part 8 in a week or so, when I will tackle the rear valance and rotted corners that wrap round to the wheel arches. Any feedback from you guys would be appreciated....Cheers Quote Link to comment Share on other sites More sharing options...
stradacab Posted August 13, 2008 Share Posted August 13, 2008 Welcome back!!! Quote Link to comment Share on other sites More sharing options...
keith1200 Posted August 19, 2008 Share Posted August 19, 2008 I enjoyed reading this thread I like how you've explained the repairs and how the picture's tie in with your repairs reminded me of reading the Hayes manual. Looking forward to more up-dates Quote Link to comment Share on other sites More sharing options...
Manta Mal Posted August 19, 2008 Author Share Posted August 19, 2008 Stradacab.....It's good to be back on the Manta build and on here after over a year, am now trying to make up for lost time. Keith......am please you like my restore updates so far, never thought of in a 'Haynes Manual' format guess that comes from studying those manuals, too many times over the years, trying to work out what vital proceedure they had left out. Have 7 on my shelf right now Quote Link to comment Share on other sites More sharing options...
Robbie Posted August 20, 2008 Share Posted August 20, 2008 good to see you back at it Mal, its a good thread Quote Link to comment Share on other sites More sharing options...
Manta Mal Posted August 26, 2008 Author Share Posted August 26, 2008 MANTA RESTORE PART 8 Hi Guys, This time it's the rear valance and lower rear quarter panels to get sorted. I had purchased the outer repair panels, but the inner sections I made up from sheet steel. Basicly, the bottom 2 inches have rotted through all around the rear end of the body shell. Here is the off side lower corner................ The repair panel was offered up, marked then the rusted body cut off 2 inches below this line.... Then as before, panel ready to be plug then seam welded..... Then a seam weld was run along the inside........... Next, this metal was cut, formed and welded in to form a box section.... This final piece was formed and welded in to double up the thickness, like it was before being cut away......... The near side corner was the same on the outside, but the inner was different due to the spare wheel well...... Inner panel cut, formed and welded in first....... Then the outer panel was plug and seam welded....... Finally the rear valance had the same treatment, lower 2" cut off........ New rear valance was plug and seam welded in place...... Just leaves the inner valance to be formed and welded in ...... Applied a small skim of filler, some electric sanding, then finished off by hand........... Then could not resist a dusting of rattle can primer, well pleased......... OK.............. that's it for part 8, hope it was of interest to some of you out there. Guess some find this fabrication work very easy, while other's it's quite a hard challange. I just feel middle of the road on this, have some basic metalwork skills built up over the years and a home garage to carry out the work. Arrrrrrrrr yes a strong love of Manta's helps too Will post part 9 in a week or so. Any feedback from you guys would be appreciated....Cheers Mal Quote Link to comment Share on other sites More sharing options...
garymanc Posted August 26, 2008 Share Posted August 26, 2008 looking foward to part 9 Quote Link to comment Share on other sites More sharing options...
Shug Posted August 27, 2008 Share Posted August 27, 2008 I wish I could fabricate bits like that! I'm paranoid my methods will result in the car looking a bit like a right arse of a job. Looking damn good so far (yours, no mine!) Quote Link to comment Share on other sites More sharing options...
Robbie Posted August 27, 2008 Share Posted August 27, 2008 your getting on well Mal with the car, its quite aquard to weld underneath the car when you have a lot to do. I find on the body panels an edge joggler is really good for butting panels together and will leave them easier welded. To cut the heat down I tend to just do a small type spot weld on the panel and do lots of them until its seam welded stops as much warping, like urself i just learnt myself so dunno what the perfect answer is. Welding the thin crap tin on a car is prob the hardest to do, Quote Link to comment Share on other sites More sharing options...
Manta Mal Posted August 27, 2008 Author Share Posted August 27, 2008 Thanks for the comments. Garymanc....you don't have to wait for the Manta to need repairs. Just fabricate a few non car items from sheet steel, then weld them up, then your be a step ahead when repairs are needed. Shug......From what I have seen of your project, all looks great to me. I don't always get the fabrication right first time. Robbie....Yes, I did consider buying a joggler, as its must be a more professional way fit the panels. However, the repair sections, I purchased, are quite thin 0.9mm or less, so the step to the original panel is very small, then after seam weld/grind/sliver of filler, the result is acceptable for low down panels. If I was cutting in new sheet steel, higher up on a wing or upper door, then the joggler would be worth the investment. Always seem to get a small amount of distortion when welding, just a case of keeping to a minimum. For a seam weld I tack every half inch, then link every other pairs of tacks on the first pass, then back to the start and weld up the remaining gaps, think they call it stitch welding? The best welds, as expected, was welding new 1.5mm steel onto the same, as used in the spare wheel well. Welding wafer thin rusty steel has always been hit or miss. Cheers........Mal Quote Link to comment Share on other sites More sharing options...
Robbie Posted August 27, 2008 Share Posted August 27, 2008 Great to see all the rot being cut out and the job done right Mal, it will stand to the car long term and you will feel all the better for knowing its done right. Quote Link to comment Share on other sites More sharing options...
Manta Mal Posted September 19, 2008 Author Share Posted September 19, 2008 MANTA RESTORE PART 9 Hi Guys....welcome back, have been busy again on the Manta. This time will run through the work on the 'B' posts, doors and boot lid........ The Manta shell I'm working on is an early type without a 'B' post. I decided to weld in a post from a scrap car, for two reasons. First, I never liked having the seat belt upper fixing, down low, below the rear quarter glass window, think its much better to be up high, on the 'B' post, as in modern cars. Secondly by adding a 'B' post, should stiffen up the body shell a bit plus add more strength, not exactly a rollover bar, but ever little helps, should the worst happen. <!-- s:scared --><!-- s:scared --> Shell does look strange without the 'B post............. New post clamped and ready for welding........... Plug and seam welded in one hit, needs to be strong, new and original seatbelt mountings shown...... These two plastic trays, with wheels on, realy help, welding gear in one , grinding gear in the other.......... ok doors next, some rust as expected on the bottom edge...... Inside the door, looking down, better than expected................ No.... I'm not being a peeping tom pervert <!-- s:emb --><!-- s:emb --> , just trying to angle the camera to show the the upper door rust and thinking....If I could only get inside the door, would make things a lot easier <!-- s:hmmm --><!-- s:hmmm --> ....... The rust inside the doors was wire brushed by hand through the 2 access holes in the side, treated, then sprayed in some hammerite paint. The outside was then sanded, found just surface rust and no pin holes, again treated the rust, thin skim of filler....... Gave the doors a dusting of primer................... Finally the boot lid, is in good condition apart from some surface rust, on the right as you look at this pic... The bad area was where some animal in the past (not me) had wacked the boot lock with a hammer and screwdriver, lock was beyond repair, panel had been pushed in and rust formed. Metal very thin at this point, so decided to plug weld, a steel washer on the inside............... This is the view from inside the boot, so to speak, looking out the boot lid lock hole.......... Final pic shows the boot lid with a dusting of primer....... Thats it for part 9, am well please with the above work. Hope it has been of some interest to you. Will post part 10 in a couple of weeks, when I will go through the modified wheel arches, not an easy job as it turned out. Any feedback from you guys would be appreciated. Cheers........Mal Quote Link to comment Share on other sites More sharing options...
Robbie Posted September 19, 2008 Share Posted September 19, 2008 You been busy again, a good rub down and some primer makes a heap of difference Doors seemed in pretty good shape I see why you put the B post in just seems a shame on an early shell Quote Link to comment Share on other sites More sharing options...
Devil Fish Posted September 19, 2008 Share Posted September 19, 2008 good work, Quote Link to comment Share on other sites More sharing options...
Manta Mal Posted September 19, 2008 Author Share Posted September 19, 2008 Robbie and Devil fish....thanks for the replys and thumbs up for my work so far. Re the addition of the b-posts,......... Interesting point you have raised, though not sure why , perhaps the A series without the b-post is rare The car is not standard in many respects, if it was, then I would not have fitted them. B-posts were fitted at the Opel factory, on the later A series and they do have some positive benefits. Quote Link to comment Share on other sites More sharing options...
keith1200 Posted September 19, 2008 Share Posted September 19, 2008 Mal totally brilliant m8 Manta Mal: perhaps the A series without the b-post is rare I don't know much about A series but the word 'Rare' sounds very nice to me A good improvement but at the same time is it losing it's rare feature? but the new pilliars look good keith Quote Link to comment Share on other sites More sharing options...
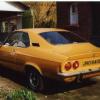
Manta Mal Posted November 9, 2008 Author Share Posted November 9, 2008 MANTA RESTORE PART 10 Hi Guys, welcome back, time for the rear wheel arches to get some serious attention.......... I have some larger, new old stock 15" wolfrace wheels, which I would really like to use on my Manta. Problems to overcome.......First the wheel mount holes (pcd) do not match the standard axle hub, so I have an adaptor / spacer plate. The advantage of using a wheel spacer each side is that the rear wheels will be 2" further apart, about the same as a 'B' series, so should help on fast cornering <!-- s:grin --><!-- s:grin --> Secondly, the down side is that the standard wheel arches would have to be enlarged, not a quick easy job. <!-- s:hmmm --><!-- s:hmmm --> Trial fitted the new wheel and spacer, then clamped some timber to the front, to emulate the side wall + clearance of a 205mm wide tyre. I estimated that the arch had to be 1" higher and 1" further out than the standard arch. Don't sound much, but creates a lot of work................ My Manta is a modified car, having said that, am trying to keep visible body mods to a minimum. I'm sure NOT looking for a wheel arch, that's too enlarged, like on this Manta.................. Needed to make the right decision here as it would be hard to go back once the standard arch was cut out. Over the folllowing week, I just kept measuring and looking at the arch 3 or 4 times a day, to work out the best way forward. I did have a pair of standard wheel arch repair panels, which with some slight modification, could be re shaped to form an arch, that was the required 1" wider then mounted 1" higher on the body <!-- s:hmmm --><!-- s:hmmm --> With gritted teeth, decided to go for it , grinder in hand <!-- s:mad --><!-- s:mad --> ...... No going back now <!-- s:!: --><!-- s:!: --> Here you see the profile and position of the new wheel arch, shown in red, with a possible profile for the inner arch <!-- s:hmmm --><!-- s:hmmm --> The standard wheel arch repair panel, had some line cuts made, to allow it to be re shapped to fit the higher up contour of the body......... (Please note..... had to re fit standard wheel, without pcd adaptor / spacer, as there are no tyres on the new wheels yet!) Wheel arch now welded on in the new position, again standard wheel shown, with no spacer............ Just required a small skim of filler, most was latter sanded off... Quick dusting of primer. Just wish I had tyres on the new wheels, for this final photo, standard ones now look lost. Am well pleased with the result so far <!-- s:D --><!-- s:D --> That's it for part 10, hope it has been of interest to some of you out there <!-- s:?: --><!-- s:?: --> Will post part 11 in a few weeks, when work on the rear inner wheel arches will be covered. As always, any feedback from you guys would be appreciated. <!-- s;-) --><!-- s;-) --> Cheers.......Mal Quote Link to comment Share on other sites More sharing options...
paulmanta Posted November 9, 2008 Share Posted November 9, 2008 That is a good way to do wider rear arches, I like the whole project so far. I have an A in similar condition and really need to get a bit of work done to it again soon. Quote Link to comment Share on other sites More sharing options...
Robbie Posted November 9, 2008 Share Posted November 9, 2008 Nice to see the project coming along Mal, nice solid rear arches now, what do you think they look like widened compared to the front wing lips now. Hope you have it out for next season Quote Link to comment Share on other sites More sharing options...
alan Posted November 10, 2008 Share Posted November 10, 2008 Nice work love threads like this keep it coming Quote Link to comment Share on other sites More sharing options...
garymanc Posted November 10, 2008 Share Posted November 10, 2008 brilliant and intresting work,are you going to arch the front wings as well Quote Link to comment Share on other sites More sharing options...
Manta Mal Posted November 15, 2008 Author Share Posted November 15, 2008 Thanks to Paulmanta, Robbie, Alan and Garymanc for the feedback One thing is for sure, I do need to get arches looking right, before spraying the car, even if it means loads more work. Cheers.....Mal Quote Link to comment Share on other sites More sharing options...
endakillian Posted November 15, 2008 Share Posted November 15, 2008 Hevan't been in here for a while-lovely thread this. Great to see work being carried out to such a high standard. Keep up the good work Quote Link to comment Share on other sites More sharing options...
Perywinkle Posted December 2, 2008 Share Posted December 2, 2008 Fantastic work you've done there Given me some good ideas as to getting more clearance for the wheels on the back of my A. Previous owner swapped the a series axle, for the b series, which I belive is wider as standard. I get an audible rubbing noise when the rear suspension compresses, also when throwing it round corners with anyone in the back. Quote Link to comment Share on other sites More sharing options...

Recommended Posts
Join the conversation
You can post now and register later. If you have an account, sign in now to post with your account.