Paul Barrett Posted April 28, 2010 Share Posted April 28, 2010 nice, look forward to every update now! Quote Link to comment Share on other sites More sharing options...
h0tr0dder_uk Posted May 4, 2010 Author Share Posted May 4, 2010 Finally cut out my first chassis rail section...only 3 more to do Here it is mocked up in place. As you can see it will make the whole front suspension unit sit approx 2-3" lower than standard. Heres what the rear chassis rails mocked up so you can see how much narrower they will be Quote Link to comment Share on other sites More sharing options...
Bsilva Posted May 4, 2010 Share Posted May 4, 2010 Hello, Very good job! I also have a blanket with the same to your body! I apologize for my English! For I am Portuguese, I learn from all of you! Quote Link to comment Share on other sites More sharing options...
h0tr0dder_uk Posted May 14, 2010 Author Share Posted May 14, 2010 (edited) Finally got myself a welder (off ebay) but the bleeding thing doesn't arc properly so its going back. In the meantime I did some more cutting - I cut out the other inner rear wheel arch. This allowed me to copy the original chassis rail and work out how the new one will fit. As you can see its will allow the axle to sit approx 3" lower than std. It will also be 2.5" box section (stronger than the 2" original) Here you can see how the new rail will protrude into the interior slightly. Edited May 14, 2010 by h0tr0dder_uk Quote Link to comment Share on other sites More sharing options...
costasa Posted May 18, 2010 Share Posted May 18, 2010 Great work hope to see what come next Quote Link to comment Share on other sites More sharing options...
h0tr0dder_uk Posted May 22, 2010 Author Share Posted May 22, 2010 Finally got my welder back so I tacked some 1 3/4" box section to both ends of the chassis rails This helped to space the rails correctly and will slip inside the 2" box section that I'll use for the center chassis rails. Then I temporarily clamped some more 1 3/4" box in the middle and tacked on the top and bottom. and voila - the rail takes shape All thats needed now is to finish weld it, grind it and do the other one. Quote Link to comment Share on other sites More sharing options...
czwh42 Posted May 22, 2010 Share Posted May 22, 2010 That's brilliant Does it ever rain where you are ? The sun is shining in all the pictures you've taken so far. You lucky, lucky, so and so. Quote Link to comment Share on other sites More sharing options...
h0tr0dder_uk Posted May 22, 2010 Author Share Posted May 22, 2010 Thanks mate. Yes it does rain, but hardly ever compared to the UK. Thats one thing I dont miss. I did think about building an A series using the roof / tub from a vauxhall twin top type car - that would be cool (but very difficult) Quote Link to comment Share on other sites More sharing options...
Kevin Abbott Posted May 22, 2010 Share Posted May 22, 2010 Great work, top fabrication Grrrr, need to move away from here to a better place too Quote Link to comment Share on other sites More sharing options...
william Posted May 22, 2010 Share Posted May 22, 2010 hi nice work what do you work as through the day are you a retired millonaire if so i am available cheap like all i need is a garage and that sunshine you are j++++ b++rd Quote Link to comment Share on other sites More sharing options...
costasa Posted May 24, 2010 Share Posted May 24, 2010 Very good work Here in Portugal we start to have sunny days but to the classics, california is better, keep the good work Quote Link to comment Share on other sites More sharing options...
h0tr0dder_uk Posted May 26, 2010 Author Share Posted May 26, 2010 Here is what the chassis rails will look like when welded to the middle rails Only problem is that they have started to warp from the tack welding already. Gonna be difficult to keep these buggers perfectly straight! Quote Link to comment Share on other sites More sharing options...
h0tr0dder_uk Posted June 3, 2010 Author Share Posted June 3, 2010 (edited) Finished welding one of the chassis rails. Here you can see that it was welded in 1" increments to try and prevent warping. Check out how much splatter is produced from this flux cored wire (I went with this as apparently its better for thicker work, I'll stick to co2/argon mix for thinner stuff). Heres a few pics of the rail before I linish down the welds Now I need to grind them down and do the other side. Edited June 3, 2010 by h0tr0dder_uk Quote Link to comment Share on other sites More sharing options...
rayman Posted June 3, 2010 Share Posted June 3, 2010 That is some seriously good fabrication work ,keep it up Quote Link to comment Share on other sites More sharing options...
Paul Barrett Posted June 3, 2010 Share Posted June 3, 2010 good work fella, i have to say though that gasless mig wire is toss in my experience, ok for thick stuff outdoors, all the same those rails will tidy up just fine. Quote Link to comment Share on other sites More sharing options...
h0tr0dder_uk Posted June 16, 2010 Author Share Posted June 16, 2010 OK - finally got my chassis rails looking how I want them But - I have stopped working on them now as I'm considering a new direction. I have found a GM car that uses a similar front suspension but has these major improvements :- 1) the track width is approx 3" narrower which would allow me to fit the wheels I want. 2) you can get dropped spindles 3) you can get big brakes kits 4) you can easily get 5 stud hubs So - I'm gonna try and get my hand on one of these front suspension clips and build my chassis around that. Quote Link to comment Share on other sites More sharing options...
johnw Posted June 28, 2010 Share Posted June 28, 2010 Looks absolutely brilliant hotrodder. whats this other GM car you are talking about? Sounds interesting... Quote Link to comment Share on other sites More sharing options...
h0tr0dder_uk Posted December 12, 2010 Author Share Posted December 12, 2010 OK - new update. I havent done much on the car over the last few months as I've been enjoying my summer over here and trying to source a chevrolet chevette front suspension. After being messed around a lot I've decided to stick with the manta front suspension and modify it. I decided that the new chassis rails that I originally built wouldnt be strong enough for a V8 so I built the following rails Also I decided to sell the F.A.S.T xfi fuel injection system that I was gonna use as I figured it would cost way to much to build a big horsepower small block chevy engine. Now I'm gonna buy a salvaged late model camaro and transplant the entire running gear (LS1 engine, 6 speed gearbox, axle etc) plus air con, radiator, steering column, etc etc If anyone has a turbo front spoiler for one of these please let me know Quote Link to comment Share on other sites More sharing options...
mantabgd Posted December 18, 2010 Share Posted December 18, 2010 Very nice project,I must say! Good luck with it! I was wandering if you could help me a bit...I saw your cardboard template of original chassis rails,and thats exactly what I need since my manta was crashed somewhere in the past,and those rails are slightly bent.Therefore,exact dimensions would mean a lot to me,and they are rotten too...so,if you can share,please do!! I`d appreciate your help!! Quote Link to comment Share on other sites More sharing options...
costasa Posted January 13, 2011 Share Posted January 13, 2011 Great project Hope to see more, keep the good work Quote Link to comment Share on other sites More sharing options...
h0tr0dder_uk Posted January 15, 2011 Author Share Posted January 15, 2011 (edited) "Very nice project,I must say! Good luck with it! I was wandering if you could help me a bit...I saw your cardboard template of original chassis rails,and thats exactly what I need since my manta was crashed somewhere in the past,and those rails are slightly bent.Therefore,exact dimensions would mean a lot to me,and they are rotten too...so,if you can share,please do!! I`d appreciate your help!!" I'd love to help but unfortunately I wouldnt ba able to guarantee that my templates were 100% accurate. One of the reasons I cut off the original rails is that they had been cut off just in front of the front crossmember and another set welded on. Since I'm gonna be fitting a higher horsepower engine this wouldn't do. Edited January 15, 2011 by h0tr0dder_uk Quote Link to comment Share on other sites More sharing options...
h0tr0dder_uk Posted February 20, 2011 Author Share Posted February 20, 2011 Finally got my @rse into gear and got into the garage (mainly 'cus its raining lol). Cut the floor so that my new chassis rails will fit at same height as originals to maintain a stockish look. 1 Quote Link to comment Share on other sites More sharing options...
monzta Posted February 22, 2011 Share Posted February 22, 2011 That silver Manta looks absolutely stunning ! Can you post some more pictures of that car as i am doing a similar build, stockish design, but with very large 19" rear alloys and 17" front ... Would love to see more pics Quote Link to comment Share on other sites More sharing options...
h0tr0dder_uk Posted February 23, 2011 Author Share Posted February 23, 2011 The silver one is my old car that i photoshopped on ebay. I just made the wheels larger. Paint was an MG colour. Quote Link to comment Share on other sites More sharing options...
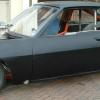
h0tr0dder_uk Posted February 25, 2011 Author Share Posted February 25, 2011 (edited) the only other pics I have are during the build and when it was finished My new project will be pretty much the same but with either 1) bigger deep dish wheels and a little lower 2)maybe just keep it on steels for a sleeper look 3) or stick to wide deep dish 15s Edited February 25, 2011 by h0tr0dder_uk Quote Link to comment Share on other sites More sharing options...

Recommended Posts
Join the conversation
You can post now and register later. If you have an account, sign in now to post with your account.