biffy1984 Posted May 10, 2016 Author Share Posted May 10, 2016 4 hours ago, Kevin Abbott said: Very nice work mate Thanks Kev, nice to get a bit of good feedback Got some more done tonight, subframe all built up. Project images are available to Club Members Only, Click to become an OMOC Member. 2 Quote Link to comment Share on other sites More sharing options...
Mike. Posted May 11, 2016 Share Posted May 11, 2016 Looking good, I will have exactly the same job to do on the running gear as you, hopefully in the next few weeks I'll get it blasted and painted. Quote Link to comment Share on other sites More sharing options...
Julian Posted May 11, 2016 Share Posted May 11, 2016 (edited) Your name should be put forward to that show " BRITAIN'S GOT TALENT" Great job being done there mate. Is that the village dance floor that you are working on? Edited May 11, 2016 by Julian Quote Link to comment Share on other sites More sharing options...
biffy1984 Posted May 11, 2016 Author Share Posted May 11, 2016 Some more done tonight, collected the engine mounted on the subframe. Project images are available to Club Members Only, Click to become an OMOC Member. Project images are available to Club Members Only, Click to become an OMOC Member. And bolted it all back in. Project images are available to Club Members Only, Click to become an OMOC Member. Project images are available to Club Members Only, Click to become an OMOC Member. Starting to take shape now anyway. Will get most of the bits and pieces cleaned up and bolted back in the bay before starting to the rest of the body. 3 Quote Link to comment Share on other sites More sharing options...
Snowy Posted May 12, 2016 Share Posted May 12, 2016 I like your idea of using tabs to bolt on your nose cone on the inner wings. But when I did it I replaced each spot weld with a fastener to try and achieve the same strength as the welded joint. I'm not sure three tabs will really work. You'll have to let me know as I will be bolting the new nose cone I have onto my cavalier coupe. What you've done is a lot easier. Thanks Quote Link to comment Share on other sites More sharing options...
biffy1984 Posted May 20, 2016 Author Share Posted May 20, 2016 On 12 May 2016 at 12:21, Snowy said: I like your idea of using tabs to bolt on your nose cone on the inner wings. But when I did it I replaced each spot weld with a fastener to try and achieve the same strength as the welded joint. I'm not sure three tabs will really work. You'll have to let me know as I will be bolting the new nose cone I have onto my cavalier coupe. What you've done is a lot easier. Thanks Yeah it's fewer fixings on the inner wings than the spotwelds, 3 6mm bolts on each side and 2 8mm bolts in through the face to each chassis leg plus the fixing through the wings so 12 bolts in total. Hope it is enough, will let you know. Quote Link to comment Share on other sites More sharing options...
biffy1984 Posted June 3, 2016 Author Share Posted June 3, 2016 Well it's been a busy few weeks, still having trouble uploading more pics after maxing out my limit on the forum but hopefully sorted for the meantime so here goes again. Been getting bodywork all sorted while welding up door posts and around the rear quarter window lips. Project images are available to Club Members Only, Click to become an OMOC Member. Project images are available to Club Members Only, Click to become an OMOC Member. A few car park dents and sorting filler over the areas where I've welded in new metal. Project images are available to Club Members Only, Click to become an OMOC Member. Project images are available to Club Members Only, Click to become an OMOC Member. Project images are available to Club Members Only, Click to become an OMOC Member. Project images are available to Club Members Only, Click to become an OMOC Member. Rear valance looked like it had been reversed into God knows how many times so had a mate helping with the filler work as I don't have the patience for it! Project images are available to Club Members Only, Click to become an OMOC Member. Project images are available to Club Members Only, Click to become an OMOC Member. And once we were happy with all the filler we tried on a spot of primer. Had some terrible bother with paint reactions but eventually after a lot of fannying around got them sorted. Project images are available to Club Members Only, Click to become an OMOC Member. Project images are available to Club Members Only, Click to become an OMOC Member. Project images are available to Club Members Only, Click to become an OMOC Member. Project images are available to Club Members Only, Click to become an OMOC Member. Once we were happy with the primer and sorting reactions we blocked it all down and remasked ready for colour. Project images are available to Club Members Only, Click to become an OMOC Member. Project images are available to Club Members Only, Click to become an OMOC Member. So last Saturday was the big day, 3 basecoat and 3 lacquer. Will need a flat down and a buff up but it's turned out really nice. Project images are available to Club Members Only, Click to become an OMOC Member. Project images are available to Club Members Only, Click to become an OMOC Member. Project images are available to Club Members Only, Click to become an OMOC Member. Project images are available to Club Members Only, Click to become an OMOC Member. Project images are available to Club Members Only, Click to become an OMOC Member. Project images are available to Club Members Only, Click to become an OMOC Member. There was a few flies who ended up crawling through the wet lacquer the pricks but again the marks should buff out. Very little dust in it which is a surprise. So Monday I pulled off the masking, fitted hubs and tyres to my nice shiny new wheels, hung the doors and pushed it outside for a look in natural light. Project images are available to Club Members Only, Click to become an OMOC Member. Project images are available to Club Members Only, Click to become an OMOC Member. Project images are available to Club Members Only, Click to become an OMOC Member. Project images are available to Club Members Only, Click to become an OMOC Member. Project images are available to Club Members Only, Click to become an OMOC Member. Very happy with the result, lovely colour out in the sun. 6 Quote Link to comment Share on other sites More sharing options...
biffy1984 Posted June 3, 2016 Author Share Posted June 3, 2016 Tuesday night I cleaned and painted all the gutter trims and fitted the glass, not before fitting my backflash in the rear window Project images are available to Club Members Only, Click to become an OMOC Member. Project images are available to Club Members Only, Click to become an OMOC Member. Project images are available to Club Members Only, Click to become an OMOC Member. Wednesday and Thursday was spent fitting up doors, seals and interior. Had Chicago grey interior in before but I far prefer the Daytona trim. Project images are available to Club Members Only, Click to become an OMOC Member. Project images are available to Club Members Only, Click to become an OMOC Member. Fitted the new spoiler I got but the middle section is a pretty poor fit so will paint and fit the old one. Project images are available to Club Members Only, Click to become an OMOC Member. And this is what she's looking like today. Project images are available to Club Members Only, Click to become an OMOC Member. Took the day off today so I could crack on with getting everything fitted up in the bay so got on good with that, retaped the loom, everything cleaned and painted before refitting and engine now running so pretty chuffed with how it's all coming along so far. Still a bit of tidying up to do, fit brake pipes etc but I'm getting there. Also sideskirts, bonnet and front panel to paint so hoping another week and it'll be nearly there.....can't wait!! 7 Quote Link to comment Share on other sites More sharing options...
H-400 Posted June 4, 2016 Share Posted June 4, 2016 This car looks great! 2 Quote Link to comment Share on other sites More sharing options...
TheRealExile Posted June 4, 2016 Share Posted June 4, 2016 It looks brilliant another top notch resto to inspire me to pull my finger out. 2 Quote Link to comment Share on other sites More sharing options...
biffy1984 Posted June 5, 2016 Author Share Posted June 5, 2016 A bit more done over the weekend, front panel painted. Project images are available to Club Members Only, Click to become an OMOC Member. Project images are available to Club Members Only, Click to become an OMOC Member. And fitted today. Project images are available to Club Members Only, Click to become an OMOC Member. Cleaned up the radiator and gave it a freshen up, fan fitted and in the car. Project images are available to Club Members Only, Click to become an OMOC Member. Project images are available to Club Members Only, Click to become an OMOC Member. Got my mate Kev doing the filler work on the bonnet which is coming along really good. Project images are available to Club Members Only, Click to become an OMOC Member. Project images are available to Club Members Only, Click to become an OMOC Member. 1 Quote Link to comment Share on other sites More sharing options...
bris jas Posted June 5, 2016 Share Posted June 5, 2016 Looking very nice, the wheels and colour go spot on together, keep up the good work! 1 Quote Link to comment Share on other sites More sharing options...
biffy1984 Posted June 6, 2016 Author Share Posted June 6, 2016 Finally got the reactions sorted on the passenger side wing and painted, did the sideskirts as well so more to build up tomorrow. Project images are available to Club Members Only, Click to become an OMOC Member. Project images are available to Club Members Only, Click to become an OMOC Member. Project images are available to Club Members Only, Click to become an OMOC Member. Front bumper all fitted up with fog lamps and Laguna splitter. Scratched my head for quite some time trying to figure out how to mount the lamps and went for some aluminium strips bent to shape on the back to end up with which means I'll have to remove the bumper to change a bulb but that's no big deal. They're a nice neat fit which is the main thing. Project images are available to Club Members Only, Click to become an OMOC Member. Project images are available to Club Members Only, Click to become an OMOC Member. 1 Quote Link to comment Share on other sites More sharing options...
Kevin Abbott Posted June 7, 2016 Share Posted June 7, 2016 Fantastic colour, stop it please as you are making me want to change my 1800 for a xe. Is it steel grey? Quote Link to comment Share on other sites More sharing options...
biffy1984 Posted June 7, 2016 Author Share Posted June 7, 2016 7 hours ago, Kevin Abbott said: Fantastic colour, stop it please as you are making me want to change my 1800 for a xe. Is it steel grey? Yeah steel grey Kev A bit more done tonight, built up the quads with the best of what I've got. Ended up with 4 pretty good hella lamps, outers were spare ones I had for my old Capri that I forgot I had. Project images are available to Club Members Only, Click to become an OMOC Member. Wings on and front end all built up. Project images are available to Club Members Only, Click to become an OMOC Member. Project images are available to Club Members Only, Click to become an OMOC Member. It's really pretty low....can just fit a fag packet on its end under the bumper so I'll have to watch where I go or the bumper won't last long Project images are available to Club Members Only, Click to become an OMOC Member. 1 Quote Link to comment Share on other sites More sharing options...
biffy1984 Posted June 8, 2016 Author Share Posted June 8, 2016 A couple of bits shotblasted and painted up with some left over 2k radiant red this afternoon, hope to fit it all tomorrow. Project images are available to Club Members Only, Click to become an OMOC Member. Project images are available to Club Members Only, Click to become an OMOC Member. 1 Quote Link to comment Share on other sites More sharing options...
biffy1984 Posted June 11, 2016 Author Share Posted June 11, 2016 Spent the last few nights doing the underside, new rear shoes and cylinders fitted, drums on and new shorter rear shocks. Also fitted my brand new scorpion exhaust, did away with the long muffler at the front and just put a pipe through to the middle silencer instead. Took a bit of cutting and welding to get it fitting right as I wanted it as tight to the floor as possible, also didn't help that the rear bits were actually for a GTE hatch. undersealed the floor also so looks a lot tidier now. Project images are available to Club Members Only, Click to become an OMOC Member. Project images are available to Club Members Only, Click to become an OMOC Member. Project images are available to Club Members Only, Click to become an OMOC Member. Front brakes fitted, Audi 80 discs, Astra calipers and goodridge hoses. Re-piped the whole car too. Project images are available to Club Members Only, Click to become an OMOC Member. Project images are available to Club Members Only, Click to become an OMOC Member. Ran the pipes from the master cylinder around the front and clipped to the underside of the front crossmember, a lot easier as going round the back. Meanwhile Kev has been working away with the bonnet, some job but it's coming great and nearly ready for paint. Hoping to paint either tomorrow or Monday as mot is booked for Wednesday so no hanging around now!! Project images are available to Club Members Only, Click to become an OMOC Member. Project images are available to Club Members Only, Click to become an OMOC Member. Project images are available to Club Members Only, Click to become an OMOC Member. Project images are available to Club Members Only, Click to become an OMOC Member. Just got to bleed the brakes now and a few odd jobs, wiring etc in the engine bay to do tomorrow. 3 Quote Link to comment Share on other sites More sharing options...
biffy1984 Posted June 13, 2016 Author Share Posted June 13, 2016 Bonnet and back bumper painted tonight, looking great! Project images are available to Club Members Only, Click to become an OMOC Member. Project images are available to Club Members Only, Click to become an OMOC Member. 6 Quote Link to comment Share on other sites More sharing options...
biffy1984 Posted June 15, 2016 Author Share Posted June 15, 2016 Well lads that's been a super busy couple of days, bonnet and bumper fitted up and lots of small jobs sorted. A few electrical issues addressed and we've gotten there in the end. Found the front shocks were bottoming out so ended up fitting a couple of avo adjustable a and screwing them to their hardest setting just till I source some more suitable springs. Also buffed the body last night and what a difference, will give the bonnet a few days for the paint to harden. Here's a few pics just before her first run out at 2 this morning! Project images are available to Club Members Only, Click to become an OMOC Member. Project images are available to Club Members Only, Click to become an OMOC Member. Project images are available to Club Members Only, Click to become an OMOC Member. Project images are available to Club Members Only, Click to become an OMOC Member. And one from the MOT station this morning which I'm delighted to say it passed with no advisories Project images are available to Club Members Only, Click to become an OMOC Member. Will get some better pics tonight and stick them on too. 6 Quote Link to comment Share on other sites More sharing options...
s11nmg Posted June 15, 2016 Share Posted June 15, 2016 Very nice I like the colour really suits it 1 Quote Link to comment Share on other sites More sharing options...
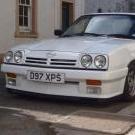
biffy1984 Posted June 15, 2016 Author Share Posted June 15, 2016 A few pics outside tonight, pity I missed the sunshine. Project images are available to Club Members Only, Click to become an OMOC Member. Project images are available to Club Members Only, Click to become an OMOC Member. Project images are available to Club Members Only, Click to become an OMOC Member. Project images are available to Club Members Only, Click to become an OMOC Member. Project images are available to Club Members Only, Click to become an OMOC Member. Project images are available to Club Members Only, Click to become an OMOC Member. Project images are available to Club Members Only, Click to become an OMOC Member. Project images are available to Club Members Only, Click to become an OMOC Member. Really chuffed with the way it's all turned out, especially the steel bonnet.....some amount of hours gone into getting it looking the way it does but well worth it!! 6 Quote Link to comment Share on other sites More sharing options...
davo Posted June 15, 2016 Share Posted June 15, 2016 Top job mate. Colour suits it well !!! 1 Quote Link to comment Share on other sites More sharing options...
TheRealExile Posted June 15, 2016 Share Posted June 15, 2016 It's blinking lovely!! 1 Quote Link to comment Share on other sites More sharing options...
spiney_norman Posted June 15, 2016 Share Posted June 15, 2016 That's a stunner mate, can't wait to see it! 1 Quote Link to comment Share on other sites More sharing options...
biffy1984 Posted June 15, 2016 Author Share Posted June 15, 2016 12 minutes ago, spiney_norman said: That's a stunner mate, can't wait to see it! Can't wait for our retro rides roadtrip now Quote Link to comment Share on other sites More sharing options...

Recommended Posts
Join the conversation
You can post now and register later. If you have an account, sign in now to post with your account.