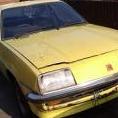
Snowy Posted May 7, 2015 Author Share Posted May 7, 2015 Got a 2L engine and gearbox from mantaman last Friday. They came attached so I took the gearbox and clutch off today. Thanks again Ian!! It is always worth removing the clutch to take a look no matter where the engine came from. Even I was surprised to see this.... So off with the flywheel to get it skimmed and checked over. Doing this now is a lot easier than putting everything back in the car and then finding out something is wrong!! Quote Link to comment Share on other sites More sharing options...
Snowy Posted May 7, 2015 Author Share Posted May 7, 2015 I also thought I'd take a look at the rear bumper. The end mounts have been bent from a knock and didn't want to come off....Anyone got any spare.. The bumper started like this... and ended like this...But to be honest the picture makes it look 100 times better than it is. It needs re chroming. 1 Quote Link to comment Share on other sites More sharing options...
MANTAMAN Posted May 7, 2015 Share Posted May 7, 2015 I had never seperated the engine and box in all the time i had them, bought for another project that has had a change of dirrection, the Manta it came out of ( not mine ) must have been driving around like this until the engine and box where swopped for an XE. That bumper has come up very well, nice and shiney with genuine age 'pattena' As for the brackets, i know i have not got any but they do not look like complicated pieces of metal, perhaps it would be possible to fabricate replacements. Quote Link to comment Share on other sites More sharing options...
Snowy Posted May 8, 2015 Author Share Posted May 8, 2015 I had never seperated the engine and box in all the time i had them, bought for another project that has had a change of dirrection, the Manta it came out of ( not mine ) must have been driving around like this until the engine and box where swopped for an XE. That bumper has come up very well, nice and shiney with genuine age 'pattena' As for the brackets, i know i have not got any but they do not look like complicated pieces of metal, perhaps it would be possible to fabricate replacements. The spring didn't actually fall out until I removed the plate. There appears to be no damage to any component. The chances are the defect in the clutch was there from day one as it is a GM part. I have already drawn up the brackets. I will just make some in work next week. Thanks Quote Link to comment Share on other sites More sharing options...
Julian Posted May 8, 2015 Share Posted May 8, 2015 Why do you have to make new brackets Snowy? You say they are only bent. Quote Link to comment Share on other sites More sharing options...
Snowy Posted May 8, 2015 Author Share Posted May 8, 2015 Why do you have to make new brackets Snowy? You say they are only bent. Bent, corroded, twisted, seized fasteners that have broken off in the threads. It is just easier sometimes to make new than to fix old. Quote Link to comment Share on other sites More sharing options...
Snowy Posted May 24, 2015 Author Share Posted May 24, 2015 Been doing a bit more, not been well so not much progress, but I have everything I need now, except bushes, to make it to billing. Decided to put the car onto my turn over jig to help with the welding on the underside. So off with the rear axle.. 6 Quote Link to comment Share on other sites More sharing options...
Snowy Posted October 4, 2015 Author Share Posted October 4, 2015 Just some updated that have been going facebook or I would but I cannot as the file sizes are too big to even fit one picture........ 1 Quote Link to comment Share on other sites More sharing options...
MANTAMAN Posted October 4, 2015 Share Posted October 4, 2015 or I would but I cannot as the file sizes are too big to even fit one picture........ I have hit this snag, the only way i have worked out to change/reduce the file size is put it on photobucket which sort of defeats the object of having a re-vamped forum, i think this is one for our techy wizzard to advise about Quote Link to comment Share on other sites More sharing options...
opelmantagsi Posted October 5, 2015 Share Posted October 5, 2015 big job on there, will be worth it tho. Quote Link to comment Share on other sites More sharing options...
®evo03 Posted October 5, 2015 Share Posted October 5, 2015 (edited) Out of interest, what ur neighbours think of a inverted flying car! Great work btw! Edited October 5, 2015 by brady Quote Link to comment Share on other sites More sharing options...
Snowy Posted October 5, 2015 Author Share Posted October 5, 2015 Out of interest, what ur neighbours think of a inverted flying car! Great work btw! They don't seem to mind. But the car isn't inverted as I found out that tilting the car with rotten chassis rails does distort the body. Only by a few mm's. Those that say it doesn't have obviously never measured the car properly once they have tried it. My car is now well supported and the right way up. I'm also using a jig made from a good car with untouched chassis rails to make sure everything stays in the right place. Quote Link to comment Share on other sites More sharing options...
Snowy Posted October 18, 2015 Author Share Posted October 18, 2015 (edited) Added pictures to photobucket of the very slow chassis repair. I did start by trying to repair what was there but decided to ho the whole hog and replace them properly. So I made this using a car with good chassis rails. Basic but light enough and ridged enough to use a jig. Light as it will be on and off quite a bit while repairs take place. Project images are available to Club Members Only, Click to become an OMOC Member. Project images are available to Club Members Only, Click to become an OMOC Member. And as suspected when you roll a manta over on a chassis roller the lower positions move by about 3 -4mm. Which is not good. Maybe if the glass was out this wouldn't happen? But I decided not to take any risks. So before the chassis rail was cut out the car was well supported. What you cant see in the pictures is the roll over jig is supporting the very front of the car but not lifting it. Project images are available to Club Members Only, Click to become an OMOC Member. The removal of the chassis leg Project images are available to Club Members Only, Click to become an OMOC Member. Project images are available to Club Members Only, Click to become an OMOC Member. Then replacing the inner. Made straight. Project images are available to Club Members Only, Click to become an OMOC Member. Then the kink added to get it to line up Project images are available to Club Members Only, Click to become an OMOC Member. Project images are available to Club Members Only, Click to become an OMOC Member. Project images are available to Club Members Only, Click to become an OMOC Member. Then welded in once checked against the jig. Project images are available to Club Members Only, Click to become an OMOC Member. Project images are available to Club Members Only, Click to become an OMOC Member. The lower chassis bolt can be put in and out using finger pressure only. Now the outer repair started Project images are available to Club Members Only, Click to become an OMOC Member. Project images are available to Club Members Only, Click to become an OMOC Member. Project images are available to Club Members Only, Click to become an OMOC Member. Project images are available to Club Members Only, Click to become an OMOC Member. Still needs cleaning up. The other side getting ready to go on. Project images are available to Club Members Only, Click to become an OMOC Member. Project images are available to Club Members Only, Click to become an OMOC Member. Project images are available to Club Members Only, Click to become an OMOC Member. Project images are available to Club Members Only, Click to become an OMOC Member. Edited October 18, 2015 by Snowy 2 Quote Link to comment Share on other sites More sharing options...
lewis p Posted January 21, 2016 Share Posted January 21, 2016 Any progress mate ? Quote Link to comment Share on other sites More sharing options...
Snowy Posted February 28, 2016 Author Share Posted February 28, 2016 Now the weather is good the work can start again.. Project images are available to Club Members Only, Click to become an OMOC Member. Project images are available to Club Members Only, Click to become an OMOC Member. Project images are available to Club Members Only, Click to become an OMOC Member. The drivers side chassis rail is completed. Next weekend, if the weather is good, the passenger side will be done. 2 Quote Link to comment Share on other sites More sharing options...
CRAZYDAVE Posted February 28, 2016 Share Posted February 28, 2016 Great work! 1 Quote Link to comment Share on other sites More sharing options...
MANTAMAN Posted February 28, 2016 Share Posted February 28, 2016 7 hours ago, Snowy said: The drivers side chassis rail is completed. That is a very neat repair,well done, now when can you fit in my R Reg coupe to have its chassie rails done..... Quote Link to comment Share on other sites More sharing options...
Snowy Posted February 29, 2016 Author Share Posted February 29, 2016 18 hours ago, MANTAMAN said: That is a very neat repair,well done, now when can you fit in my R Reg coupe to have its chassie rails done..... To be honest I've got doing this down to a fine art now. It's only the weather that stops me. If I could be bothered and the weather was good enough it only takes a couple of days per side. There isn't that much to do underneath. So the plan is finish all the welding I can find, blast the underside, etch prime, and upol raptor etc. Then put the car back together getting the interior right. Then paint at a later date. Quote Link to comment Share on other sites More sharing options...
Snowy Posted March 13, 2016 Author Share Posted March 13, 2016 Thought I would take the windows out today to see how bad the rot would be under the rubbers. I'm quite happy, only one small piece to deal with Project images are available to Club Members Only, Click to become an OMOC Member. Project images are available to Club Members Only, Click to become an OMOC Member. Project images are available to Club Members Only, Click to become an OMOC Member. 2 Quote Link to comment Share on other sites More sharing options...
Snowy Posted May 6, 2016 Author Share Posted May 6, 2016 (edited) Look what I've found to replace the rotten cavalier front nose cone.... Never thought I'd find a brand new one of these. Edited August 18, 2017 by Snowy 3 Quote Link to comment Share on other sites More sharing options...

Recommended Posts
Join the conversation
You can post now and register later. If you have an account, sign in now to post with your account.