®evo03 Posted February 7, 2021 Share Posted February 7, 2021 Joining the poly disc club, got two cars to strip of original paint. Q? Is there any other shapes available, for a drill, as hard to access some corner areas with a flat disc. Quote Link to comment Share on other sites More sharing options...
Jessopia74 Posted February 8, 2021 Share Posted February 8, 2021 5 hours ago, ®evo03 said: Joining the poly disc club, got two cars to strip of original paint. Q? Is there any other shapes available, for a drill, as hard to access some corner areas with a flat disc. Sort of, not sure about drill, but I gave a pad kit fir a die grinder and my 99deg mini grinder, but after that not sure. Local sand blaster I guess is going to be the best way if you have a tight corner you want to get into. Quote Link to comment Share on other sites More sharing options...
mantasrme Posted February 8, 2021 Share Posted February 8, 2021 11 hours ago, ®evo03 said: Joining the poly disc club, got two cars to strip of original paint. Q? Is there any other shapes available, for a drill, as hard to access some corner areas with a flat disc. Yes you can get drum ones with a shaft to go into drills etc like this https://www.frost.co.uk/shaft-mounted-strip-disc/ once they were down a bit they are really useful for the little nooks and crannies 3 Quote Link to comment Share on other sites More sharing options...
Bonga Posted April 21, 2021 Author Share Posted April 21, 2021 No updated for a while but I've been getting stuff done. Got the front end stripped and painted. I used bonda primer as on it 1st. It's a epoxy based paint with added zinc but doesn't use an activator so there's no waste if you put too much in the gun. You can also paint it with a bush, Ideal for inner sills etc. Sounds like decent stuff and it sprayed on easy. Next I coated it with 2 part high build primer then knocked it back with a block and some 120 or 180 grit wet n dry. I decided to got for polar white 2 pack paint. The spaying didn't go as well as I'd hoped. I did have an orange peel effect (I am a beginner). After some research and some messing around it looks like the air pressure was too low. I knocked it back with 1500 then polished it and it looks decent now Project images are available to Club Members Only, Click to become an OMOC Member. Project images are available to Club Members Only, Click to become an OMOC Member. I made a start with the passenger side sill area. I did the inner part from the rear seat area. Project images are available to Club Members Only, Click to become an OMOC Member. Project images are available to Club Members Only, Click to become an OMOC Member. It's nice to compare this are to what I started with Project images are available to Club Members Only, Click to become an OMOC Member. Project images are available to Club Members Only, Click to become an OMOC Member. Project images are available to Club Members Only, Click to become an OMOC Member. Project images are available to Club Members Only, Click to become an OMOC Member. Project images are available to Club Members Only, Click to become an OMOC Member. 9 Quote Link to comment Share on other sites More sharing options...
bris jas Posted April 21, 2021 Share Posted April 21, 2021 Coming on well, always nice to look back on how bad it was to start with and how good you make it look now.👍 1 Quote Link to comment Share on other sites More sharing options...
Jessopia74 Posted April 21, 2021 Share Posted April 21, 2021 Big time to repair that around the steering column bearing and bulkhead👍. looks a solid repair . My AsconaA was pretty bad around there too, took a lot of steel and time 😬 Quote Link to comment Share on other sites More sharing options...
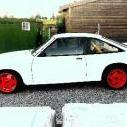
®evo03 Posted April 21, 2021 Share Posted April 21, 2021 Fairplay, going great guns there with the welding and painting, great repairs on places that are not easy, another manta saved, been along time since ive seen a manta that pale blue colour, must be a B? Pre 83. 1 Quote Link to comment Share on other sites More sharing options...
H-400 Posted April 21, 2021 Share Posted April 21, 2021 Nice work . It's for sure a B1, it has got those two grilles (left & right) in front of the windshield. Keep up the good work👍 2 Quote Link to comment Share on other sites More sharing options...
Bonga Posted April 24, 2021 Author Share Posted April 24, 2021 On 22/04/2021 at 00:21, H-400 said: Nice work . It's for sure a B1, it has got those two grilles (left & right) in front of the windshield. Keep up the good work👍 Thanks guys. Its an early cavalier MK1 shell. I think it's pre 1980. I just changed the nosecone over as I prefer the manta look and the nosecone was rotten anyway. Side project happening just now with a wee mx5 I use for autotesting is taking my time just now. Get back to the manta in a few weeks. 1 Quote Link to comment Share on other sites More sharing options...
Bonga Posted May 29, 2021 Author Share Posted May 29, 2021 Finally got it up on the spit. I managed to get the inner sill on the passenger's side done. I thought this was quite a tricky piece to build back up but it's all hidden so didn't bother too much with how it looks as long as the strength was there. Here are some before and afters. Project images are available to Club Members Only, Click to become an OMOC Member. Project images are available to Club Members Only, Click to become an OMOC Member. Project images are available to Club Members Only, Click to become an OMOC Member. 4 Quote Link to comment Share on other sites More sharing options...
Bonga Posted June 9, 2021 Author Share Posted June 9, 2021 Another wee repair done and that finishes that area off now. Onto wheel arches next. I'm fitting a 400 kit so not too bothered about how they look. Was thinking of cutting the old arch back so all the rot was gone, then just expending the old inner arch out to meet the lip of the fibreglass 400 arch. Anyone did this before. Looking for a simple solution. Project images are available to Club Members Only, Click to become an OMOC Member. Project images are available to Club Members Only, Click to become an OMOC Member. 4 Quote Link to comment Share on other sites More sharing options...
Bonga Posted September 3, 2022 Author Share Posted September 3, 2022 No updated in a long time. Progress been really slow but slow is better than none. The welding was a real saga for me. Never welded or cut a piece of metal before I bought this shell. Learned some real lessons and I could have went back to the start and done some of the earlier work I'd done as I could see how much I had improved. Anyway got the underside all done. Sprayed it with matt black stone chip and ready to fit the axles back on next and get it off the spit. Next up axles then engine and gearbox fitted. Might get that before Christmas 😄 Project images are available to Club Members Only, Click to become an OMOC Member. Project images are available to Club Members Only, Click to become an OMOC Member. 9 Quote Link to comment Share on other sites More sharing options...
Bonga Posted January 22, 2023 Author Share Posted January 22, 2023 Realised that I haven't done anything for nearly a full year. So last week I had a spare few hours Sunday afternoon and stripped the rest of the inside. Got rid of any surface rust and gave the interior a blast of primer. Actually gave me a wee bit of motivation to get on with it. Might manage a coat of white this week. Quote Link to comment Share on other sites More sharing options...
Jessopia74 Posted January 22, 2023 Share Posted January 22, 2023 49 minutes ago, Bonga said: Realised that I haven't done anything for nearly a full year. So last week I had a spare few hours Sunday afternoon and stripped the rest of the inside. Got rid of any surface rust and gave the interior a blast of primer. Actually gave me a wee bit of motivation to get on with it. Might manage a coat of white this week. Time does fly huh. Quote Link to comment Share on other sites More sharing options...
Moonmonkey Posted January 22, 2023 Share Posted January 22, 2023 1 hour ago, Bonga said: Realised that I haven't done anything for nearly a full year. So last week I had a spare few hours Sunday afternoon and stripped the rest of the inside. Got rid of any surface rust and gave the interior a blast of primer. Actually gave me a wee bit of motivation to get on with it. Might manage a coat of white this week. Know how you feel, lost 6months on mine last year, and mine is nowhere near as big a project as yours. Some good work you are doing there, and big respect for the self taught welding and painting.👍 Got back to mine in last couple of weeks and now really motoring, despite the set backs you always seem to get. Should be going for a MOT this week😊 Good luck and keep going 1 Quote Link to comment Share on other sites More sharing options...
Bonga Posted January 22, 2023 Author Share Posted January 22, 2023 Good stuff. Thanks pal. Hoping i can get things moving, even if its just an hour or 2 a week. Its something. It's funny how the random things motivate you to get a move on. I watched a few rally videos over the festive on fb and YouTube and thought I need to get on the track with mine. Even let my forum membership lapse but renewed it there as I feel posting and reading other people's builds helps spur you on as well. 2 Quote Link to comment Share on other sites More sharing options...
®evo03 Posted January 22, 2023 Share Posted January 22, 2023 Same boat, few hrs a week is better than 0. Keeps the thing moving👍 Quote Link to comment Share on other sites More sharing options...
Jessopia74 Posted January 22, 2023 Share Posted January 22, 2023 Just now, ®evo03 said: Same boat, few hrs a week is better than 0. Keeps the thing moving👍 Think I am now into a few minutes a week 🤦♂️😂 Quote Link to comment Share on other sites More sharing options...
®evo03 Posted January 22, 2023 Share Posted January 22, 2023 Every second counts, even if it's a cuppa, and a plan ,🤔 1 Quote Link to comment Share on other sites More sharing options...
Jessopia74 Posted January 23, 2023 Share Posted January 23, 2023 9 hours ago, ®evo03 said: Every second counts, even if it's a cuppa, and a plan ,🤔 I’m great at the plan part 😝 Quote Link to comment Share on other sites More sharing options...
Bonga Posted February 22, 2023 Author Share Posted February 22, 2023 (edited) Another bit of progress at the weekend. Managed to get the inside painted. Next up Engine, box and axles fitted and get it off the spit. Project images are available to Club Members Only, Click to become an OMOC Member. Edited February 22, 2023 by Bonga 9 Quote Link to comment Share on other sites More sharing options...
Paul Barrett Posted February 23, 2023 Share Posted February 23, 2023 Great progress! Quote Link to comment Share on other sites More sharing options...
Mike. Posted February 23, 2023 Share Posted February 23, 2023 That’s looking factory fresh, probably better than when it was new 👍 1 Quote Link to comment Share on other sites More sharing options...
Dominik Stchnij Posted February 23, 2023 Share Posted February 23, 2023 Hi . I wish my one be on this stage. I know what it means. I forgot about my project for several years. now i have an "A" very close to me. I try to use every half hour to do something. It's the only way to move forward 1 Quote Link to comment Share on other sites More sharing options...
Jessopia74 Posted February 23, 2023 Share Posted February 23, 2023 3 hours ago, Mike. said: That’s looking factory fresh, probably better than when it was new 👍 Definitely more paint, that’s a fact 😂 Nice progress @Bonga. Guess you’re going std seat mounting points too. I was tempted to do rails but think it’s better OEM. Quote Link to comment Share on other sites More sharing options...

Recommended Posts
Join the conversation
You can post now and register later. If you have an account, sign in now to post with your account.